
What Is Copper Electroforming?

Items in the workshop tank mid-session, each one wired to the bus bar and waiting for copper.
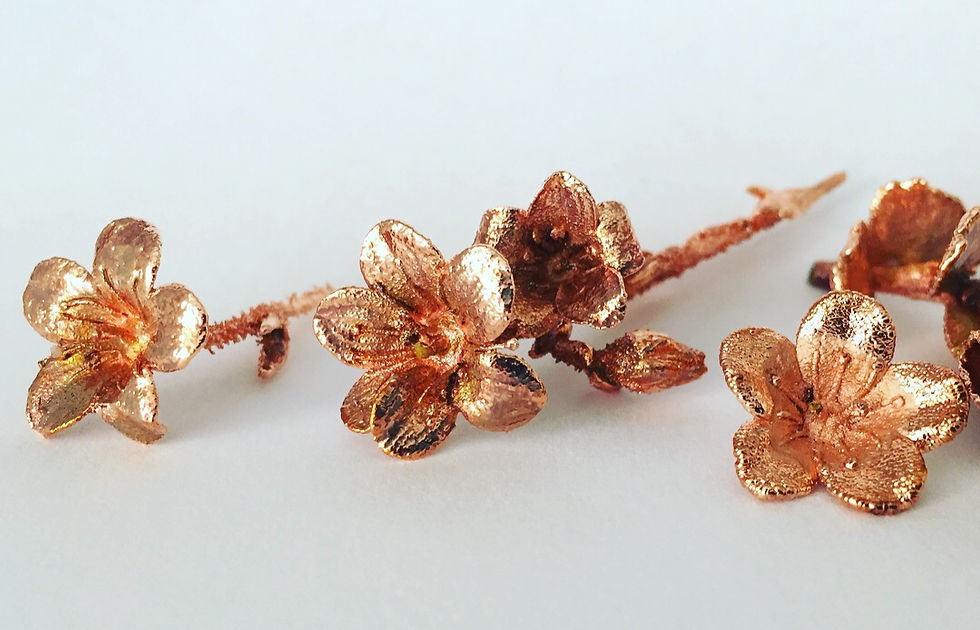
Copper electroforming is the process of depositing a layer of copper onto a non-conductive object using electricity. The result is a metal coating that follows the exact shape and surface detail of the original item, from a leaf to a crystal to a 3D printed form.
It is one of the few processes that gives almost any object the look and feel of solid metal.
How It Works
Electroforming uses electricity to move copper from a solution onto the surface of your item. That is the whole process. Electricity goes in, copper comes out on your item.
The short version: your item sits in a tank of liquid. That liquid contains copper. When you switch on the power supply, the copper travels through the liquid and sticks to your item, building up layer by layer until you have a solid copper shell.
You do not need to understand the chemistry to get great results. If you want to go deeper into the science behind it, the full explanation is in our book at the end of this post.
Why Copper?
Copper is the standard metal for electroforming because it is forgiving. It deposits evenly across a wide range of current settings and temperatures. It also has high throwing power, meaning it reaches into recesses and complex shapes without leaving bare patches.
Other metals are used in electroforming: silver, gold and nickel. Copper is the starting point because it is easier to control, more affordable, and gives you a strong base other metals are applied over later.
What It Looks Like in Practice
You seal your item to protect it from the electrolyte. You coat it in conductive paint so the copper has something to bond to. You wire it into a circuit and lower it into the tank. You set your current, turn on the power supply, and wait.

In the first few minutes you see a thin, pink copper layer starting to form. Over hours, that layer thickens. The final result is a copper shell holding every surface detail of the original object.
A few numbers worth knowing from the outset:
Operating temperature: 15 to 30°C, optimum at 25 to 27°C
Electrolyte pH: below 1
Starting current density: 0.05 amps per square inch of surface area
These figures come up repeatedly as you develop your practice. They are what separates consistent results from guesswork.

Electroforming vs Electroplating
People use these terms interchangeably. They are not the same process.
Electroplating adds a thin decorative or protective coat of metal onto an existing metal item. Electroforming builds up a thick structural layer of copper, usually on a non-conductive item. The object produced through electroforming is made of copper in a way electroplated items are not.
If you plate a silver ring, you are adding a surface coat. If you electroform a leaf, you are creating a copper object in the shape of the leaf.
Who Is This For?
Copper electroforming is used by jewellers, makers, and artists who want to create metal pieces from natural materials or unusual forms. Leaves, flowers, crystals, shells, feathers, seed pods, 3D printed objects, resin pieces. If it holds its shape and takes a coat of conductive paint, it is a candidate for electroforming.

Getting started does not require an industrial setup. A 5L tank, a power supply, the right chemicals, and the correct safety equipment is enough to produce professional results at home.
What Comes Next
Ready to get started? Over the next few weeks we will cover everything you need to set up your first electroforming session at home: the kit, the chemicals, and what you can skip.
In the meantime, if you want to get hands-on sooner, our electroforming kits have everything you need to start from scratch.
And if you would prefer to learn with guidance, our online and in-person workshops walk you through the full process step by step.

The article is well structured and the ideas are expressed clearly. I found the section dedicated to the practical details particularly useful. I shared this text in a discussion group dedicated to the topic. It is a text that provides a clear and well-organised view of the topic.